Skip to product information
1 of 16

The LabRat™ Micro Sterilizer

The LabRat™ Micro Sterilizer

Regular price $225.00 USD
Regular price Sale price $225.00 USD
Sale Sold out
Quantity

Optimize your lab workflow with The LabRat™ - Rhizo Funga's second generation Touch-Less Induction Sterilizer, which makes sterilizing mycology tools even easier.  

Like the The TableTop™, the The LabRat™ uses a proximity sensor and programmable timer relay to deliver hands-free, consistent sterilization every time. Just slide your tool in the tool slot - no need to press, hold, or wait around 

This smart, tabletop unit heats your scalpel or other metal tools to sterilization temperatures within seconds. Once the preset cycle completes, the coil automatically shuts off, allowing the tool to cool in place—ready when you are. With fully customizable timing, you can adjust sterilization duration to fit your specific tools and protocols.

Built for efficiency and comfort, the The LabRat™ features a glass slide-in tool holder. Designed for durability and ease of maintenance, most components are user-replaceable with a standard screwdriver. A red LED indicator clearly signals when the unit is active, and it comes complete with a 12V DC power supply.

Ideal for both professional and hobbyist mycologists, the Rhizo Funga Induction Sterilizer not only saves time—cutting down the brief, but repeated attention typically required for sterilization during culture work, but eliminates tool holding, button pushing and placing the tool for cooling . Once you use one, you won’t want to go back.

View full details

Collapsible content

Usage & Safety Guidelines

Induction Coil Heating

This device uses low-voltage, high-frequency electromagnetic induction to rapidly heat metallic tools placed within the coil. It is specifically optimized for thin, low-mass ferromagnetic metals—such as carbon steel scalpels, tweezers, thin forceps, and inoculation loops commonly used in mycology and lab environments.

Tools must be made of ferrous or magnetic stainless steel. Non-ferrous metals (e.g., aluminum, brass, or non-magnetic stainless like 304/316) may not heat effectively or at all.

Avoid using oversized, thick, or high-mass metal tools, as they may absorb excessive energy, overheat the coil, or exceed the device's safe operating limits.

Allow tools and the device to cool between cycles as needed to maintain
performance and safety.

Sensor-Activated Heating

The unit features a high-sensitivity induction proximity sensor that automatically starts the heating cycle when a ferromagnetic metal
object (like a steel blade) is placed within ~5mm of the sensor.

This feature ensures:

  1. The coil is only activated when a compatible tool is present
  2. Accidental activation by non-metallic or unsafe objects is prevented

Manual Activation (Override)

If a tool has a non-ferromagnetic handle (e.g., plastic), the sensor may not detect it. You can manually start the heating cycle by pressing the power button.

Use Manual Mode With Caution:

Ensure only the metal portion of the tool is positioned in the coil’s heating zone

Avoid overheating heat-sensitive handles or adjacent components

Always monitor the heating time when using manual mode to prevent tool or device damage

Sterilization & Heat Cycle Timing

The required heating duration depends on the mass, thickness, and material of the tool. To reduce wear and avoid overheating, always use the minimum effective heat cycle.

General Heating Duration

A #11 scalpel blade typically requires 5–7 seconds to reach sterilization temperature

Longer-than-needed heating cycles may cause:

  1. Coil and component overheating
  2. Premature wear of the heating system
  3. Melting or discoloration of the internal components
  4. Thermal damage to internal electronics or base structure

Back-to-Back Cycles Warning

Avoid inadvertently activating another cycle immediately after one completes, as the tool may already be at high temperature. Reheating can quickly exceed material limits and damage the tool tray or device components.

User Responsibility

Use only the shortest effective heating time for sterilization

Avoid overheating by calibrating cycle duration based on the tool type

Regularly inspect and replace inserts to maintain safe operation (Contact us for replacements)

Safety Tip: You may stop the heating cycle at any time using the power button.

Product Specifications

Sterilization Time: 5-7 seconds
Chamber Diameter: 0.55 in / 14mm
Chamber Length: 6 in. / 153mm
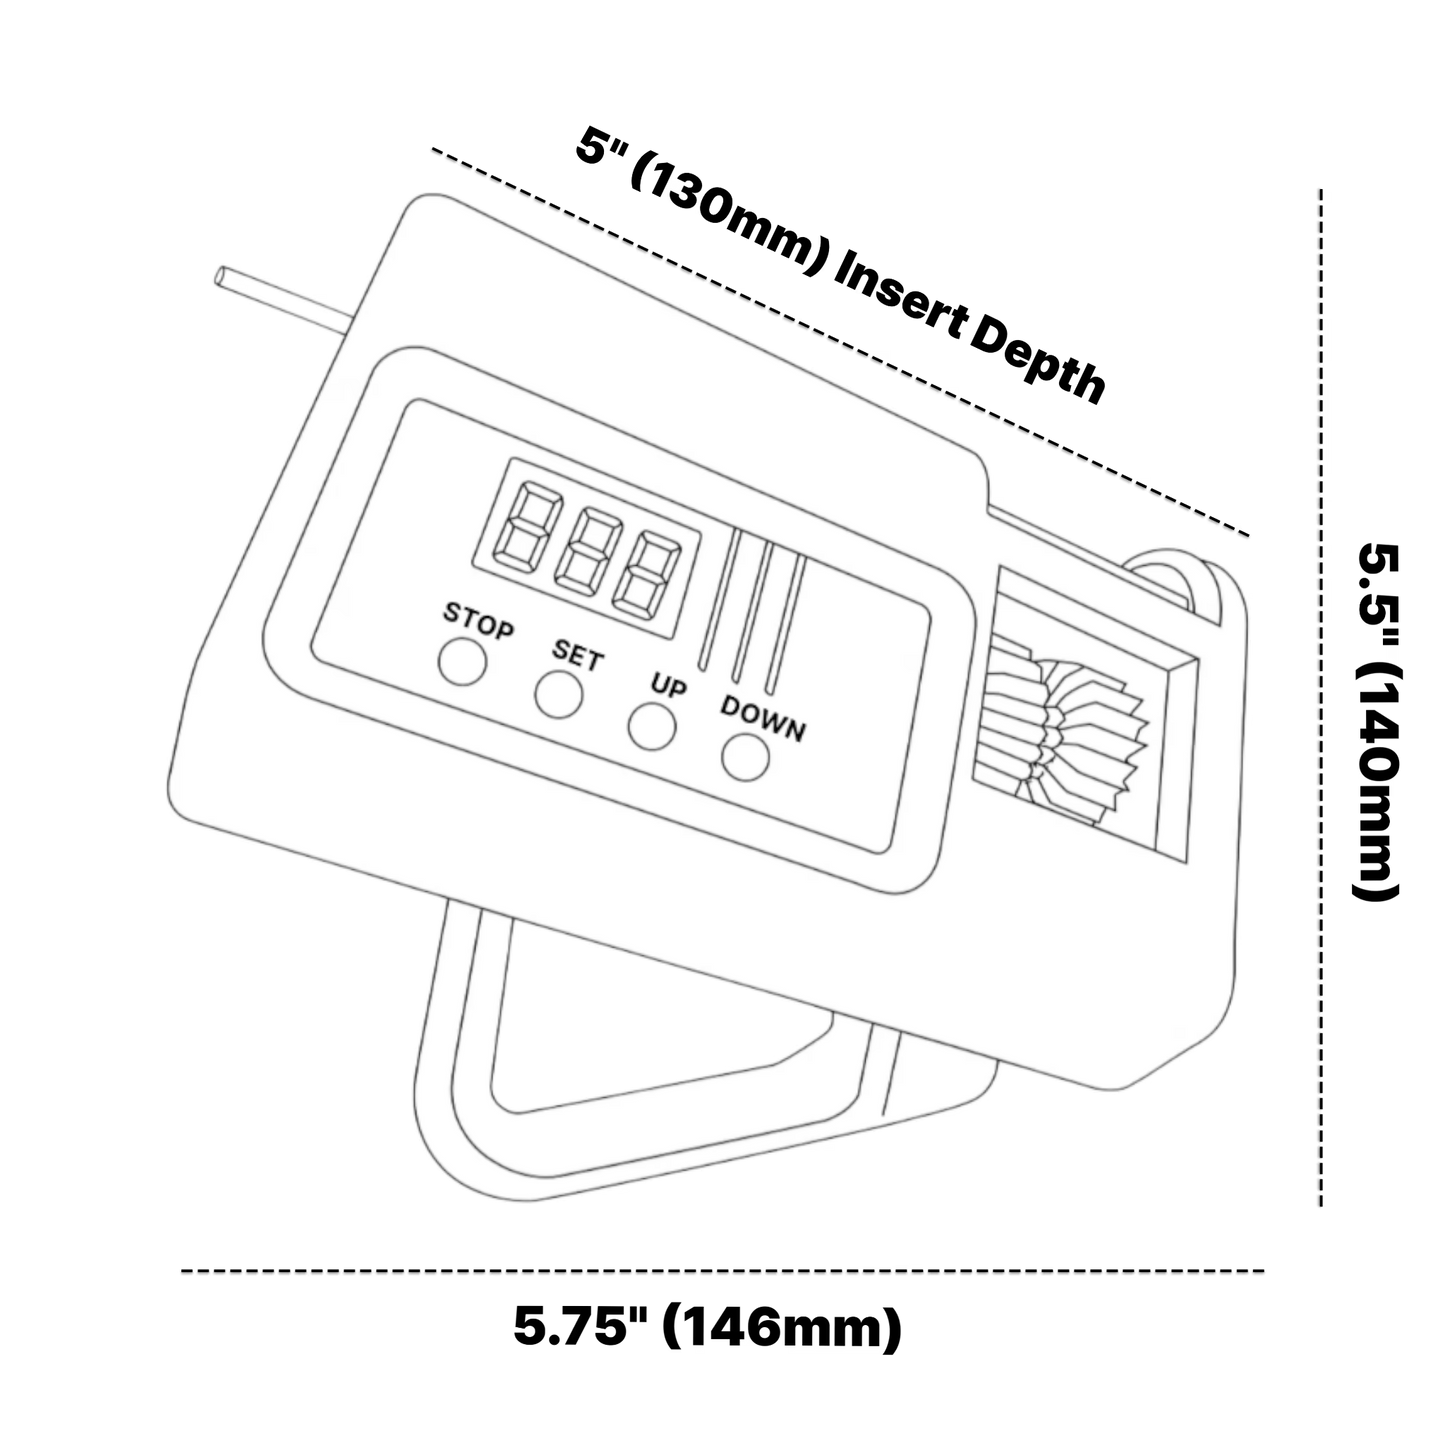
External Dims. (in): 4 x 6 x 6.5
External Dims. (cm): 10.2 x 15.2 x 16.5
Weight: 2.9 lbs (1.3kg)
Electrical: 115 or 230V 50-60Hz; 170W
Warranty: 1 Year

Timer Module Instructions

This built-in timer relay controls the sterilizer’s heat cycle automatically once a tool is placed on the tray. You program how long the induction coil stays active based on your sterilization needs—then simply set it and forget it.

Each sterilizer comes pre-programed with the following default settings: 

Display timing: 0.1–999.9 seconds (tenths)

Mode: P2 - Coil starts heating when tool is placed. Replacing the tool cancels the heating cycle immediately.

Auto Sleep Toggle: On

Key Features

  • Built-in Reverse Polarity Protection
  • Auto Sleep Mode: Screen turns off after 5 minutes of inactivity
  • Independent, Programmable Timers: Customize heating cycles to suit your tools
  • Saves All Settings: No need to reprogram after power-off
  • Hands-Free Activation: Uses a proximity sensor—no buttons or foot pedals
  • Visual Indicator: Backlit LCD screen and red LED show when coil is active

Programming the Heating Cycle

Enter Setup Mode
Long-press the SET button until the screen flashes.

Select Operating Mode
Use UP/DOWN arrows to cycle through modes (P0–P9).

Press SET to confirm the mode and move to timing setup.

Set Heating Duration
Use UP/DOWN to adjust how long the coil stays active.

Press STOP to change time units (seconds, milliseconds, or minutes).

Save Settings
Long-press SET to save and exit.

Timing Options

  1. 1–9999 seconds (whole seconds) 
  2. 0.1–999.9 seconds (tenths) Recommended for the purpose of this device
  3. 0.01–99.99 seconds (hundredths)
  4. 1–9999 minutes

Calibrating the Optimal Heat Duration

To fine-tune the heat cycle for a specific tool:

  1. Dim the room or turn off ambient lighting to make glowing metal visible.
  2. Set the timer to 5 seconds.
  3. Place the tool on the tray to trigger the cycle.
  4. Observe when the tool begins to glow faint red.
  5. if this occurs before the cycle ends, press the power button to stop the cycle early.
  6. Note the time it took to reach that glow.
  7. Reprogram the timer to match that observed time 

Mode Descriptions 

In each mode, placing a tool on the tray activates the proximity sensor (the “trigger”).

P0 – Simple Sterilize (Ignore new tools during heat cycle)

The coil turns on for a set time, then turns off.Replacing the tool during this
time won’t restart the timer.

P1 – Resettable Sterilize (Resets each time you place the tool)

Coil starts heating when tool is placed. If you replace the tool during the cycle, the timer restarts.

P2 – Interruptible Cycle (Abort if sensor is reactive during the cycle)

Coil starts heating when tool is placed. Replacing the tool cancels the heating
cycle immediately.

P3 – Delay Start (Heating begins after a pause)

After placing the tool, there’s a pause (cool-down or safety buffer), then the
coil turns on for the set time.

Modes P4-P9 use cases below are not recommended/ typically not applicable for this device. Use of these modes may impose a safety risks and/or damage to the device. 

P4 – Loop Mode (Start with Heating)

After placing the tool, it begins alternating between heating and rest cycles (ON → OFF → repeat) until you remove the tool or power it down. Not recommended for typical lab use.

P5 – Loop Mode (Start with Rest)

Like P4, but starts with a pause before heating. Useful for precise intervals.
Not recommended for typical lab use.

P6 – Automatic Loop (No trigger needed, always cycling)

The sterilizer will automatically cycle ON/OFF even if no tool is placed. Not
recommended for typical lab use.


P7 – Alternate Loop (Starts with OFF, always cycling)

Same as P6, but starts with the OFF period first. Not recommended for typical lab use.

P8 – Hold While Present (Coil stays ON as long as the tool is present)

As long as a tool is resting on the tray, the coil stays active. Once removed,
a cool-down timer starts. Not recommended for typical lab use.

P9 – Opposite Hold (Coil is OFF while tool is present, ON after it’s removed)

Rare use case—coil remains off while a tool is present, and turns on only after
it's taken away. Not recommended for typical lab use.

Extras

Auto Sleep Toggle: Long-press STOP to enable/disable screen sleep.

Quick View: Short-press SET on the main screen to review your settings.

Cycle Info Toggle: In modes P4–P7, press SET to toggle between viewing timer values or cycle count.

Customer Reviews

Be the first to write a review
0%
(0)
0%
(0)
0%
(0)
0%
(0)
0%
(0)